Umbrella Swift Guide: What It Is, What to Buy, How to Use It
The fastest way to wind a skein into a ball. Materials, mounting styles, and the models worth buying at each price point, verified June 2026.
An umbrella swift is a rotating frame that holds a skein of yarn open while you wind it into a ball. Without one, winding a skein by hand becomes an exercise in untangling, or a two-person job: draping the skein over someone else’s outstretched arms while you wind, which works in a pinch but isn’t something to depend on every time you bring home new yarn. With a swift, the same job takes under two minutes, alone. If you buy yarn in skeins, a swift is the first tool to own.
Nearly all quality hand-dyed and specialty yarn comes in skeins, so for most knitters, weavers, and spinners the swift earns its place right after the loom or wheel itself. The rest of this guide covers how it works, what to buy at each price point, and how to use it without tangling.
How does an umbrella swift work?
An umbrella swift works by spinning freely on a center post so the skein pays off without resistance. The arms expand outward like an umbrella opening, cradling the skein in a circle. As you pull the yarn off and wind it onto a ball winder or by hand, the swift turns to feed the yarn off without tangling.
The clamp attaches to the edge of any table. Arm length is adjustable, and most umbrella swifts accommodate skeins from roughly 1.5 to 2.5 yards in circumference, which covers the vast majority of commercial yarn skeins. Two edge cases are worth knowing about before you buy: laceweight sometimes comes wound in an 880-yard skein with a smaller circumference than that range assumes, and an extra-large handspun hank can run past the top end and need a jumbo swift instead. For anything else in a standard commercial weight, a regular adjustable umbrella swift covers it.
Worth keeping straight: a swift is not the same tool as a skein winder, even though the names get used loosely. The swift is passive. It just holds a skein open while something else, your hands or a ball winder, pulls yarn off it. A skein winder does the opposite job: it actively wraps loose yarn into a measured skein, the tool spinners reach for to turn freshly plied yarn off the bobbin into a hank before washing and finishing. Most knitters and weavers only ever need the swift. Spinners usually end up owning both.
Wood or plastic: which umbrella swift should you buy?
Buy wood if you use a swift more than occasionally, and plastic only to test the tool or outfit a budget second location. Wood rotates more smoothly and does not flex under tension, while plastic does the job for standard skeins at a third of the price.
Wooden umbrella swifts in lacquered birch or beechwood run from $40 to $80 and last indefinitely. The rotation is smooth, the clamp is solid, and the wooden arms do not flex under tension the way plastic does on larger skeins. This is the right choice for anyone who uses a swift more than occasionally.
Plastic umbrella swifts from KnitPicks and similar retailers run $20 to $30. They work correctly for most standard commercial skeins. The arms can flex and the bearings feel slightly rougher than wood. They are the right choice if you are testing whether you need a swift at all, or outfitting a second location on a limited budget.
The Schacht Yarn Swift is the high-end option at the top of the category: hardwood construction with a wall-mount or table-clamp option and smoother rotation than entry models. At $80 to $100, it is the correct choice if you process a lot of yarn and want equipment that does not wobble under a 800-yard laceweight hank.
Which mounting style is right: clamp, stand, or wall mount?
A table clamp suits most people, a floor stand suits a permanent spot, and a wall mount suits a dedicated studio. The clamp is the portable standard; the stand trades a little stability for convenience; the wall mount is the steadiest but cannot move.
Table clamp is the standard for portable setups. Clamps to any table edge within the arm’s reach. The clamp needs a table edge at least 1 to 2 inches thick to grip securely; most kitchen and studio tables qualify. Limitation: you need to position it before each use.
Floor stand swifts have a weighted base instead of a clamp, standing alone. More convenient if the swift lives in one location permanently, slightly less stable than a clamp on a heavy hank. Etsy has hand-turned hardwood versions from small makers in the $80 to $150 range.
Wall mount swifts (including one Schacht option) attach to a wall bracket. Extremely stable, but permanent. Right choice for a dedicated studio; overkill for a living room setup.
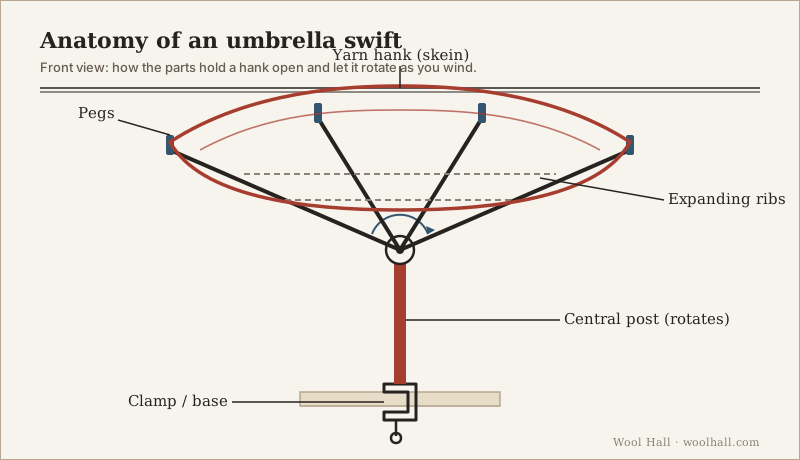
The five parts that matter: the clamp anchors to the table, the central post rotates, the ribs expand to the skein’s circumference, and the pegs cradle the hank so it pays off cleanly. Wool Hall original diagram.
The picks
Best all-around: any lacquered birch table-clamp umbrella swift from $40 to $60. Halcyon Yarn, Paradise Fibers, and Webs all carry versions of this standard format. The construction is solid and the rotation is smooth enough for any commercial skein. Buy one of these and you will not need to replace it.
Best budget: KnitPicks plastic swift (~$25). Does the job for standard skeins. Buy this if you want to try a swift before committing to wood, or if you need a spare for a second location.
Best premium: Schacht Yarn Swift ($80–$100). Buy this if you process a high volume of yarn, use extra-large handspun hanks regularly, or want equipment that is indistinguishable from fine studio furniture.
As an Amazon Associate, Wool Hall earns from qualifying purchases, at no extra cost to you.
How do you use an umbrella swift?
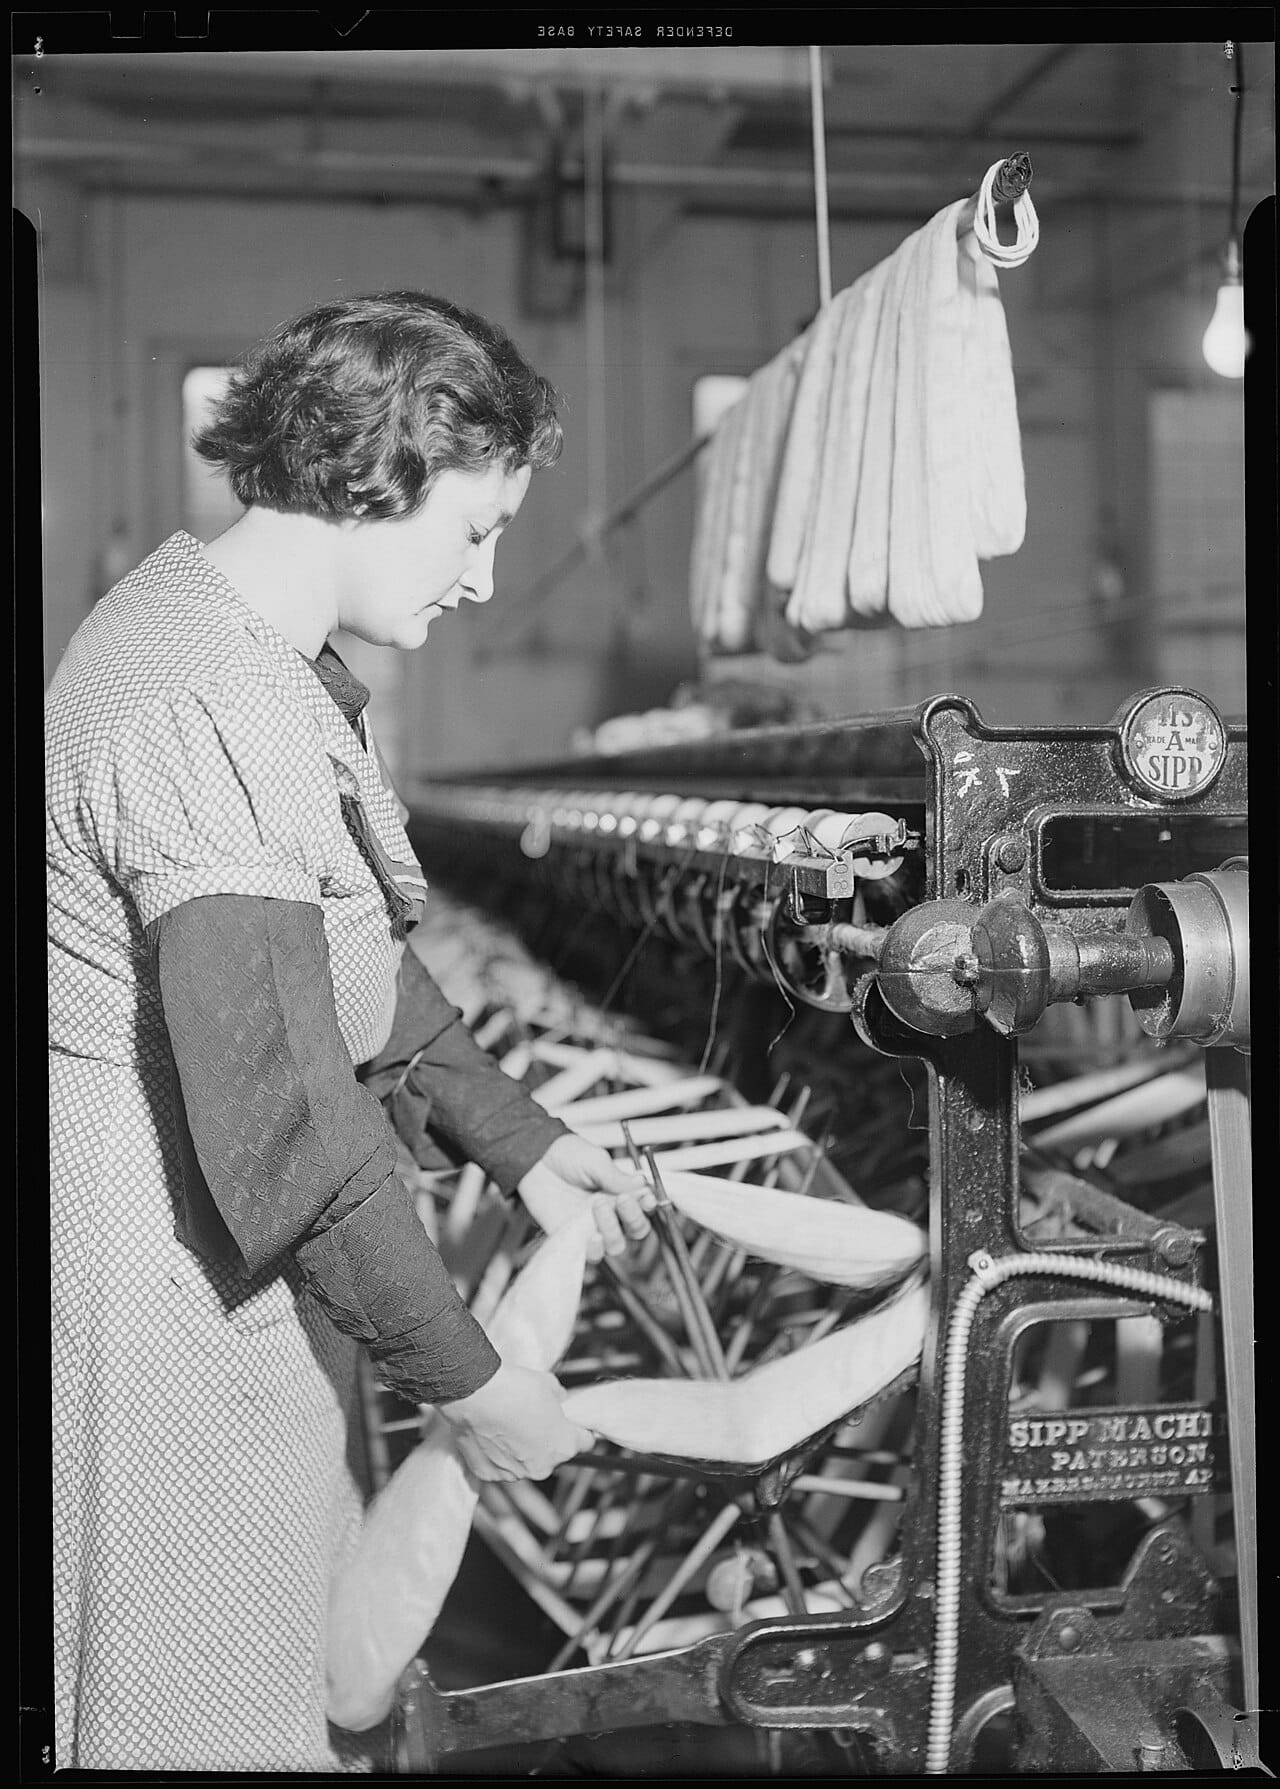
To use an umbrella swift, slip the skein over the expanded arms, find the yarn end, and wind it off onto a ball winder or by hand while the swift rotates. The five steps below walk through it from an unopened skein to a finished ball.
- Undo the skein’s ties (the short strands holding it in a loop). Keep the ties for reference or discard.
- Slip the skein over the swift’s arms. Adjust the arm length until the skein sits taut but not stretched.
- Find the yarn end, usually woven back through the skein. Pull it free.
- Thread the end onto the ball winder, or wind by hand into a center-pull ball using the Andean bracelet method, or just let it wind into a simple outside-pull ball if a center-pull cake doesn’t matter for this yarn.
- Crank the ball winder (or wind by hand). The swift rotates, the yarn pays off, and the skein winds onto the ball in one unbroken motion.
A ball winder isn’t required to get value from a swift. The swift alone still does the hard part, holding the skein open and tangle-free, and most people wind by hand for a while before deciding a winder is worth the counter space. What it adds is speed and a tidier result, not something the swift can’t do without it.
Two things that go wrong for beginners: (1) mounting the skein before expanding the arms far enough, so the yarn is slack and drapes off the arms; and (2) pulling the yarn at an angle that twists the skein instead of paying it off cleanly. Both are fixed by: arms adjusted until the skein is visibly taut, and the yarn path running parallel to the table rather than at an angle.
A swift and ball winder together cost $50 to $150 depending on materials and brand. For weavers and drop spindle spinners buying or making yarn in skein form, it is the highest-return tools investment in the studio; the combined setup pays for itself in untangling time within the first month. When you’re ready to put that yarn on a loom, the swift and winder have already done their part.