Warping a Loom: Back-to-Front vs Front-to-Back Explained
Most US guilds teach back-to-front as the standard; front-to-back suits fine yarns and complex threading. Step-by-step guide to both warping methods.
Warping is setting up the loom before weaving: measuring the warp threads, transferring them to the loom, spreading them to width, and threading them through the heddle eyes and reed. The two standard methods are back-to-front and front-to-back. On a floor loom this takes two to six hours per project, the step beginners most underestimate.
Every thread in the finished cloth starts as a warp thread, measured to the correct length on a warping board or mill, tied in a chain, and finally tied onto the front apron rod. Weaving cannot begin until all of this is complete.
Two methods dominate: back-to-front and front-to-back. The Handweavers Guild of America and most US weaving programs teach back-to-front as the standard. Peggy Osterkamp’s “Winding a Warp and Using a Paddle” (1998, revised 2014) covers the back-to-front process in greater depth than any other single text and is the reference most frequently cited by US weaving teachers. Front-to-back has its own strong tradition, particularly in European and Scandinavian guild practice, and suits certain yarn types and threading patterns better than back-to-front. Both methods produce a correctly warped loom; the choice is a procedural one, not a quality one.

What is the first step in warping a loom?
Both back-to-front and front-to-back warping begin the same way: measuring the warp threads to the correct length on a warping board or warping mill, and forming the cross.
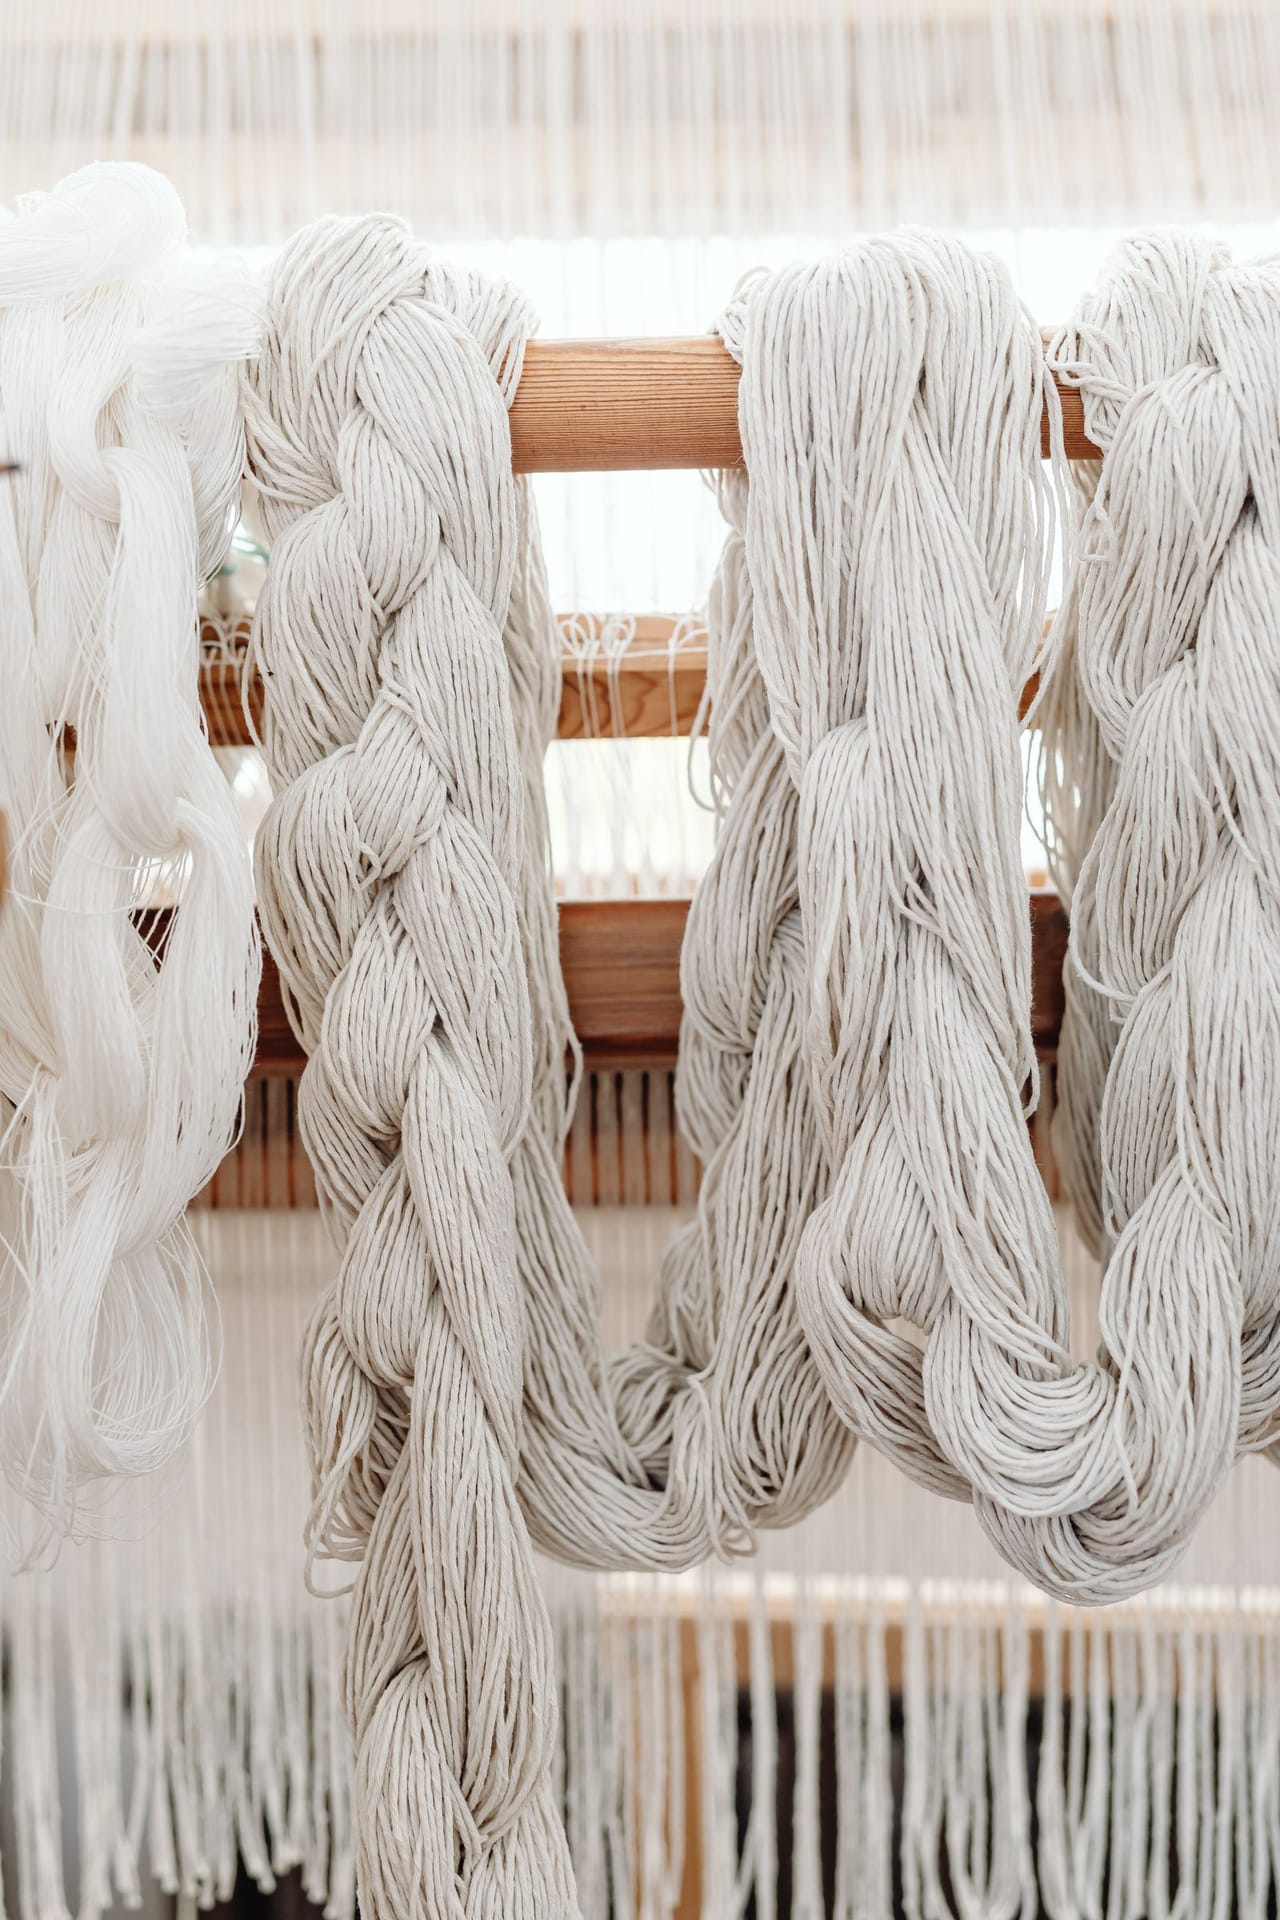
A warping board is a flat board with pegs arranged in a grid. The weaver winds yarn back and forth from one end to the other, looping around pegs to accumulate the full number of threads at the correct length. Most warping boards accommodate warps up to 10 to 12 yards; longer warps use a free-standing warping mill instead.
The cross (also called the lease) is a figure-8 formed near one end of the warping board by routing the yarn around two pegs in alternating directions. Every thread goes over peg A and under peg B on the first pass, then under A and over B on the return. After all threads are wound, the cross contains every thread in sequence, alternating above and below: thread 1 is above, thread 2 is below, thread 3 is above, and so on. This sequence is what keeps threads from tangling in all subsequent steps. The cross is the most important thing on the warping board. Protect it.
Before removing the warp from the board, tie the cross with waste yarn: two ties between the two cross pegs (one on each side of the figure-8) to keep it intact. Then choke-tie the warp every 18 to 24 inches along its length to prevent tangling during transfer. Chain the warp off the board by looping it through itself in a series of loops, like a long crochet chain, for easy transport to the loom.
How does back-to-front warping work?
Back-to-front warping loads the warp onto the warp beam first, then threads the heddles and sleys the reed. Sometimes written B2F or called “beam-first,” it is the sequence recommended in Peggy Osterkamp’s books and taught by the Handweavers Guild of America as the standard floor-loom warping process.
The back-to-front sequence:
Attach the warp to the back apron rod. The back apron rod is the metal or wooden rod tied to the warp beam by short cords. Loop the chained warp over the back apron rod and secure it with a lark’s head knot or simple loop tie. The warp hangs off the back of the loom, still chained.
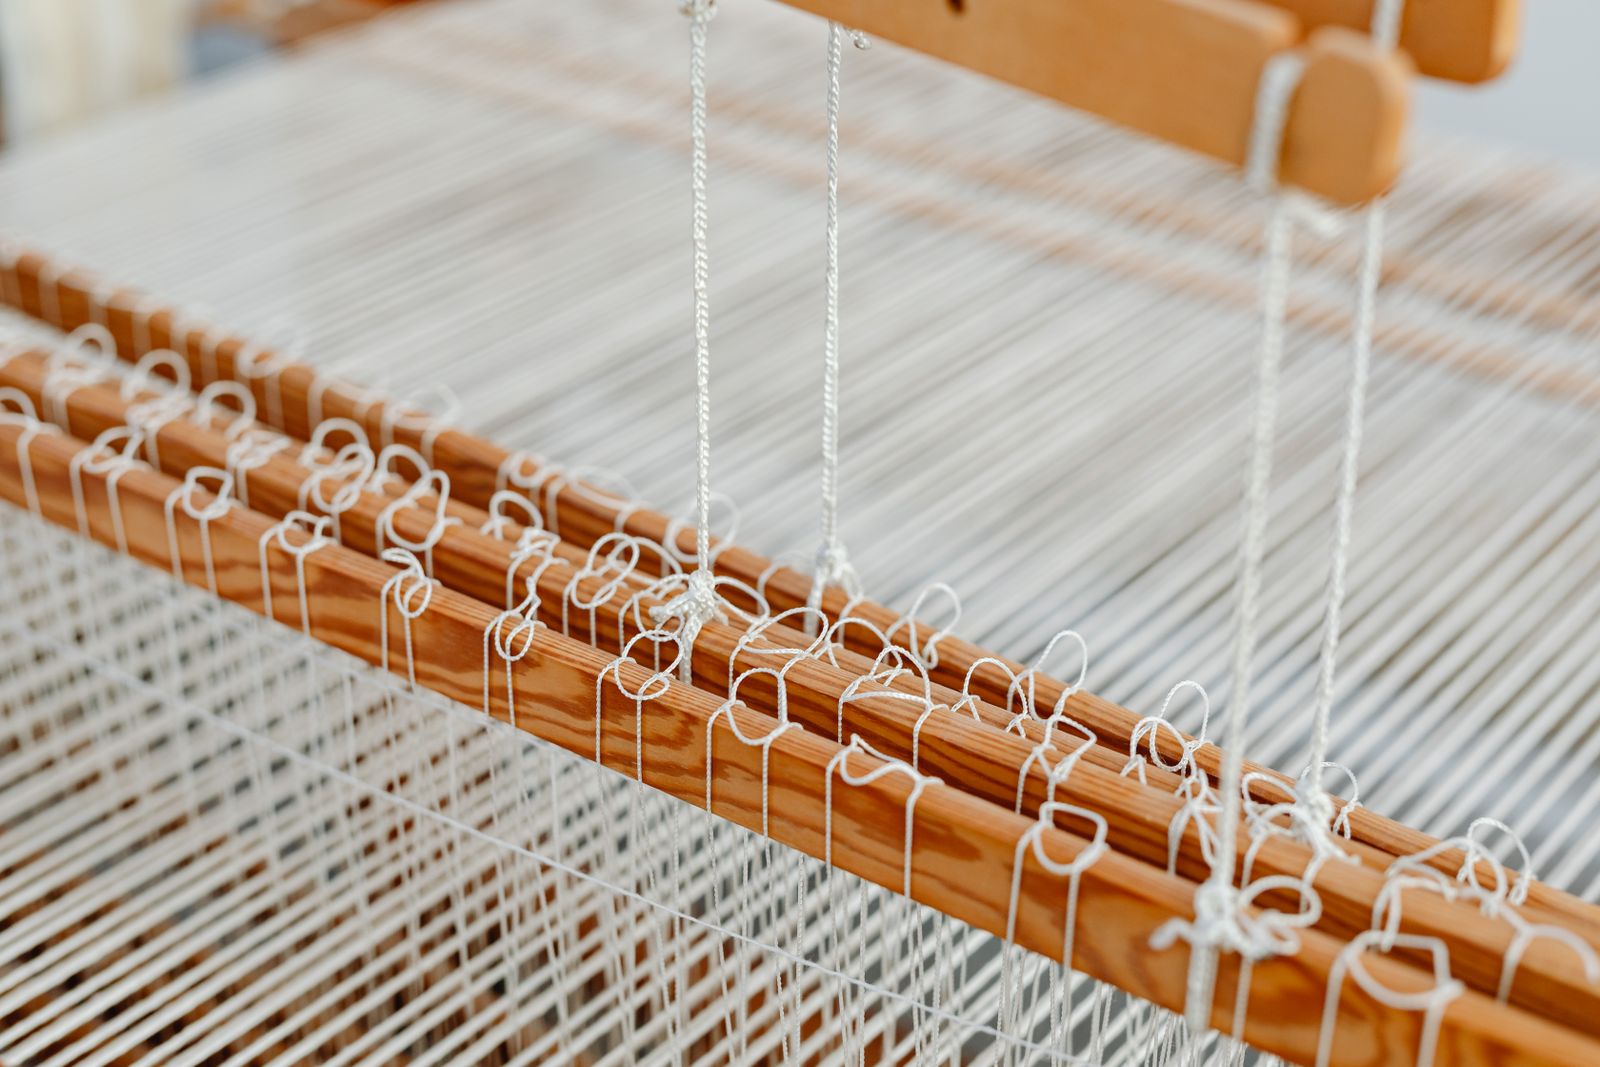
Insert lease sticks through the cross. Unchaining the warp near the cross end, carefully insert one lease stick through each side of the figure-8. Tie the sticks together at both ends with short cords so the cross cannot close. The sticks now float in the warp, maintaining thread order. They will stay here through beaming.
Spread the warp with a raddle. Clamp the raddle across the back beam. Working from the lease sticks forward, spread the warp threads across the raddle so the full weaving width is covered, with the same number of threads per inch across the width. A raddle with one-inch spacing takes 10 threads per inch across a 15-inch section as 15 threads per section, for example.
Beam the warp. With one person maintaining tension by holding the warp from the front (or using a mechanical tension brake), the other cranks the warp beam to wind the warp on. Every few rotations, slide packing material (kraft paper, warp sticks, or heavy cardboard) between the layers to prevent earlier layers from sinking into later ones. Keep the lease sticks close to the back beam as the warp winds on; they will advance backward as the chain feeds through.
Thread the heddles. Once the warp is fully beamed, carry the lease sticks to just behind the shafts. Thread each warp thread through the eye of the correct heddle on the correct shaft, following the weave draft’s threading sequence, working from right to left (or the preference stated in the draft).
Sley the reed. Draw each thread through the appropriate dent in the reed, following the sleying plan from the draft. Close the beater.
Tie on to the front apron rod. Gather threads in small bundles and tie each bundle onto the front apron rod with a bow knot, adjusting tension until all bundles feel equal when plucked. Advance the warp to the fell line position and begin weaving.
Why back-to-front is the default: tension. While beaming, a helper (or a raddle weight system) applies steady pull from the front of the loom as the beam cranks. This tension straightens each thread and seats it smoothly in the rolled layers. Uneven beaming produces uneven weaving tension; beaming under consistent tension is the single most effective way to avoid it.
How does front-to-back warping work?
Front-to-back warping reverses the order: threading and sleying happen before beaming. Sometimes written F2B or called “thread-first,” it brings the warp to the front of the loom, sleys it through the reed, threads it through the heddles, and then beams the warp backward onto the warp beam.
The front-to-back sequence:
Sley the reed at the front of the loom. Loop the warp chain over the breast beam so the cross end hangs at the front of the loom. Insert lease sticks through the cross as described above. Working thread by thread from the lease sticks, draw each warp end through the correct reed dent using a threading hook.
Thread the heddles. With the threads already through the reed, draw each thread back through the correct heddle eye on the correct shaft. Working from the reed toward the back of the loom, the threading is done with the weaver standing or sitting at the front of the loom, looking through the reed.
Attach to the back apron rod. Gather the ends emerging from the back of the heddles in small bundles and tie each bundle to the back apron rod, spreading them evenly across the rod.
Beam backward. While a helper or tensioning system holds the warp from the front, crank the warp beam in the normal direction, winding the warp on. Insert packing material between layers as in B2F. The cross and lease sticks can be placed near the shafts and allowed to advance backward as the warp winds on, or they can be removed at this stage since thread order is now locked by the reed.
Tie on to the front apron rod. As in B2F, tie even bundles to the front rod and balance tension before weaving.
When front-to-back is preferred: threading visibility and sticky yarns. Because the threading is done at the front of the loom while looking through the reed, the weaver can see each heddle eye clearly and correct errors easily. For complex pattern drafts with 100 or more threads in intricate sequences, some weavers find this visibility worth the tradeoff. F2B is also recommended for fuzzy or sticky yarns (mohair, angora, some wool-nylon blends) that would cling together and create false crosses during beaming if fed through the heddles first.
Which warping method should you use, and when?
Use back-to-front for your first warp, smooth yarns, and repeat production; switch to front-to-back for sticky yarns, complex pattern threading, or solo warping with no helper to hold tension. The Handweavers Guild of America and most US weaving schools teach back-to-front as the standard first method.
The short summary of the consensus position: back-to-front is more forgiving of beginner tension errors during beaming, more efficient for medium-complexity threading, and better suited to smooth-surfaced yarns (wool, cotton, linen) in standard weights.
Front-to-back is not wrong or advanced. It is the standard method in many European guild traditions and is described with equal authority in Madelyn van der Hoogt’s “The Complete Book of Drafting for Handweavers” (1993). Some weavers switch permanently to F2B after discovering that threading at the front of the loom suits their working style. Others use B2F for plain projects and F2B for complex pattern threading. Both are correct.
Rule of thumb from guild practice:
| Situation | Recommended method |
|---|---|
| First floor loom warp | Back-to-front |
| Smooth-surface yarns (wool, cotton, linen) | Back-to-front |
| Complex pattern threading (many repeats, intricate sequence) | Front-to-back |
| Sticky or fuzzy yarns (mohair, angora, wool-nylon) | Front-to-back |
| Solo warping (no helper to hold tension during beaming) | Front-to-back |
| Production warping, repeat projects | Back-to-front |
What is sectional warping?
Sectional warping is a third method that bypasses the warping board entirely. The warp beam has dividers creating 1-inch or 2-inch sections across its width. Rather than winding one long warp and beaming it all at once, the weaver winds yarn from spools or cones directly onto the beam one section at a time, each section beamed to the same length under controlled tension from a spool rack or tension box. All sections together produce the full weaving width.
Sectional warping is fastest for long production warps (20-plus yards) where winding a conventional chain would be impractical. It is used by production weavers who keep cones of the same yarn on hand for repeat projects. It requires a sectional beam and matching spool rack, which are not standard on entry-level looms. For most beginners, sectional warping is not the starting point.
How is warping a rigid heddle loom different?
A rigid heddle loom is faster to warp because the heddle and reed are one piece: there are no separate shafts, no floor-loom heddle threading, and no raddle. A scarf warp takes about 30 minutes against the 4 to 6 hours a beginner spends on a first floor-loom warp.
The most common rigid heddle warping method is direct (or “on-loom”) warping: pegs are clamped to the front and back beams, and the weaver winds yarn back and forth from front peg to back peg, threading each thread through alternating slots and holes in the heddle as it crosses. No warping board is required for short warps.
For warps longer than the peg distance allows, a warping board is used and the warp is transferred to the loom afterward, but the threading step remains fast: threads pass through heddle slots and holes rather than individual heddle eyes on separate shafts. A beginner can warp a 15-inch rigid heddle loom for a scarf in about 30 minutes. The same beginner might spend 4 to 6 hours on their first floor-loom warp.
This difference in setup time is one of the main factors in the rigid heddle vs floor loom decision. Floor looms produce more complex cloth structures; rigid heddle looms produce most common cloth faster with less setup. If warping time is a significant constraint, a rigid heddle is worth considering even for weavers who eventually want a floor loom.
What are the most common warping mistakes?
The mistakes that ruin a warp cluster around four points: losing the cross, uneven beaming tension, sleying errors, and threading errors. Each one shows up later as a defect in the cloth, and each is far cheaper to prevent than to fix.
Losing the cross. If the cross is not tied with waste yarn before the warp is removed from the warping board, threads tangle and re-sorting them by hand takes longer than the original winding. Always tie the cross with at least two waste-yarn ties before unchaining.
Uneven beaming tension. Threading unevenly during beaming creates a warp that weaves unevenly: some threads break under tension while others remain slack. In B2F, the solution is consistent tension from the front throughout beaming. In F2B, the solution is even bundle sizes when tying onto the back rod.
Sleying errors. Misthreaded dents in the reed (wrong spacing, skipped dents, doubled-up dents) create uneven spacing in the finished cloth. Verify the sleying by counting dents across a few inches before tying on.
Threading errors. A wrong heddle or wrong shaft for a thread shows up as a structural error in the weave pattern that cannot be corrected once weaving begins. Check threading by weaving a few inches of header on scrap yarn before starting the actual project.
Skipping the width calculation. The weaving width set during warping determines finished cloth width after take-in and shrinkage. Warping at the full stated weaving width of the loom without accounting for take-in produces finished cloth that is 10 to 15 percent narrower than expected. Plan the warp width with the take-in margin built in.
Choosing where to start
For a first floor loom: back-to-front, following Osterkamp or the instructions packaged with the loom. The Schacht Baby Wolf and Cricket both ship with warping instructions appropriate to each loom type; follow those rather than a generic guide, since apron rod attachment and raddle positioning vary by loom.
For a rigid heddle: direct peg warping, using the peg method in the manufacturer’s instructions. Schacht’s Cricket instructions and Ashford’s rigid heddle documentation both cover the direct method clearly. The warping board is optional equipment for a first rigid heddle project.
The goal of warping is a loom with every thread in its correct position, under consistent tension, ready to produce the cloth you planned. Both methods deliver that result. The choice is a matter of yarn type, project complexity, and working preference rather than correctness.